
I just launched an e-course version of DIY Writing Retreat–Your DIY Writing Retreat–and it’s been a lot of fun. I’ve taught before and I’ve taken online ecourses before–both emailed and not–so I had a pretty good idea of what I should make it look like. But actually making this course took longer than expected.
I thought I’d share a quick guide to how to make an e-course using MailChimp, my automated email service of choice.
If you follow these steps and add your own content, you’ll have an e-course that works like this:
- People sign up to take your e-course on a MailChimp sign-up form (in other words, by joining a MailChimp list).
- They receive an email that starts the course. Emails = lessons.
- By clicking or waiting a certain amount of time, they get another email lesson.
- The course sends automatically whenever someone joins the list.
If you’ve ever signed up to get a free mini-course from someone’s website, this is likely what you got–automated emails in a sequence that makes sense.
Here’s how to do it:
Step 1. Outline your e-course by breaking up an idea or a lesson into roughly half-page-long chunks. If you’ve ever planned out a syllabus or a lesson plan unit, this is a lot like that. Think of each email as a lesson that gives the reader one thing to take away. For example, when I was working on Your DIY Writing Retreat, I made one day “Pick a date” and focused on how to find time to get away.
 Step 2. Add assignments to each day. For each day of Your DIY Writing Retreat, I wanted there to be a clear takeaway. The best way to do this is make that takeaway into a concrete task. So, for example, on the “Go shopping” day of Your DIY Writing Retreat, I made a printable grocery shopping list and gave the reader the assignment of printing it out and buying the supplies on it.
Step 3. If you have a free MailChimp account, upgrade it. You only need to sign up for the cheapest level of service ($10/month) to get access to “Automation,” or the ability to make emails that send themselves.
Step 4. Make a MailChimp List for your e-course. You don’t want everyone on your regular email list (if you have one)  to get your course–just the few who sign up (unless you’re making an intro-to-you course–then this list can be your newsletter list!). So, make a separate list for these folks and design a sign-up form.
Step 5. In MailChimp, go to “Automation” and click on the “Create Automation Workflow” button. Set it to send to the list you just created and choose the type of workflow that you want to send–I used “Educate Subscribers.” Your list should be empty, so this won’t actually send to anyone–yet.
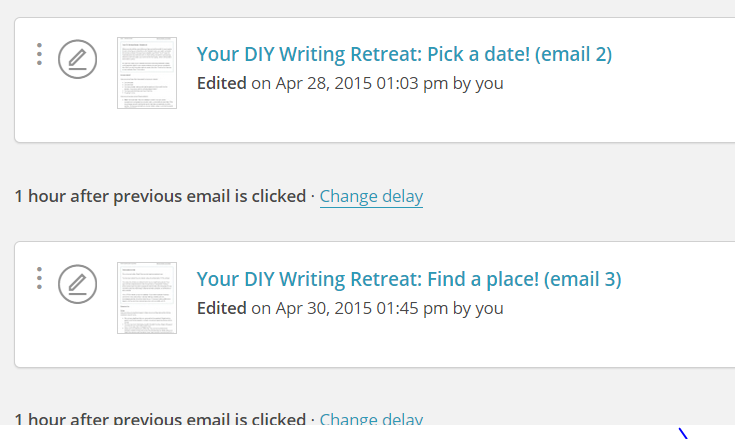
Step 6. Design your first email, then click “Add new email” and design the next one. Repeat.
Step 7. Making any printables? Create them in the program of your choice and save them as PDFs. Then, upload to Dropbox (another free service–isn’t the Internet great?) and click on the “Share” button to get a link you can put in your emails/lessons.
Step 8. Decide on the trigger for each email. If you want the emails to send automatically (so that once someone signs up, they get one email per day or one email per week), then change the settings for each email so that it sends periodically after the last email has been sent (or opened). If you want the e-course to be self-paced (so that the reader controls when to get the next email), change the settings for each email so that it sends after the last email  has been clicked. (You get to choose what they click–I made a button for each of mine that sent them to a page on my website that just says “Thanks for clicking! Your next lesson is on its way.”)
Step 9. Test the e-course! Add yourself to the list you made and make sure everything works: links, downloads, triggers. Look for typos. Have someone else try it out and ask them for feedback.
Step 10. Confirm! Add start sharing the sign-up form on your website. (Like this: Are you interested in running Your DIY Writing Retreat? Buy the course here!) If you want to offer it for sale, keep the link hidden and send the code to customers who buy it–if you buy my course, you’ll get the link in a spiffy PDF so you can sign up and take the course at your leisure.
Have you thought about making an e-course? Please share in the comments what’s stopping you if you have!


